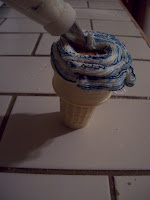
The Ice-Cream Cone Cupcakes ...
I have had a lot of people asking me how I made the ice-cream cone cupcakes. It made me decide that I would do a step- by -step for anyone who wanted the instructions.
Step #1 Make your cake batter (although in almost every instance I prefer scratch above mix, this is not the case for cake. I think that cake mix is so much more moist than any scratch cake I have ever made).
Step #2 Take ice-cream cones and put them into a 9X13 baking dish ( I used a 9x9 for this batch).
Step #3 Fill the ice-cream cones with cake batter. You don't want to over fill them, I know this from experience, what a mess! Fill them to about 3/4 of the way up to the top of the cone.
Step #4 Cook the cup cakes for about half an hour at 350 degrees on the centre rack. Let them cool.
Step #5 To get the rainbow effect, take a Q-tip and dip it into food colour gel. I then ran stripes of food colour up the sides of the icing bag. It helps to put the icing bag into a large cup to stabilize it.
Step #6 I start the icing around the outside of the cupcake. I then circle around to the inside. I put pressure on the icing bag when I finish and then pull up, to make the ice-cream swirl.
Step #7 Eat and enjoy!


No comments:
Post a Comment